
In the era of AI-powered tools, editing photos has never been easier—but the key to stunning results lies in how you phrase your requests. Vague prompts often lead to overprocessed, unnatural images, while detailed, thoughtful ones yield edits that enhance without distorting. Whether you’re restoring family heirlooms, fixing selfies, or elevating casual shots to studio quality, these five expert tips will help you write prompts that prioritize realism, detail, and emotional integrity. Drawing from professional photography techniques, we’ll explore common pitfalls and proven phrasing strategies.
1. Sharpen Images Naturally—Avoid the Fake, Plastic Look
One of the biggest temptations in AI editing is simply asking for “sharper” photos, but this can result in an artificial, overly smoothed appearance—like a doll’s face rather than a real one. The goal is clarity that respects the original texture and details, ensuring the image feels authentic.
What Not to Do:
Don’t say: “Make this photo clearer.” This vague instruction might trigger aggressive sharpening, leading to unnatural edges or a glossy, plastic sheen on skin, hair, and eyes.
What to Do Instead:
Try:
Upscale the image to 2K/4K resolution, apply moderate sharpening, and preserve the original skin, hair, and eye textures. Avoid plasticizing the skin or causing blur. Optimize sharpness and clarity for a natural level.
-

- Before

-

- After

This approach ensures the photo becomes crisp and detailed while staying true to life. The result? A sharper image that retains its genuine, unfiltered essence—no uncanny valley vibes.
2. Restore Old Photos Like a Pro Photographer’s Workflow
Vintage photos hold irreplaceable memories, but a generic “restore this” command can strip away the soulful patina that makes them special. Treat restoration as a step-by-step process, mimicking how seasoned photographers handle archival work.
What Not to Do:
Avoid: “Restore this photo for me.” This hands-off request might overdo it, erasing the subtle aging that evokes nostalgia.
What to Do Instead:
Specify:
Analyze the photo and restore it using a 5-step professional process:
- Clean up noise and grain.
- Recover lost details in textures and edges.
- Restore faded colors to their original vibrancy.
- Balance exposure and contrast for even lighting.
- Preserve the photo’s original emotional tone and atmosphere.
-

- Before

-
- After
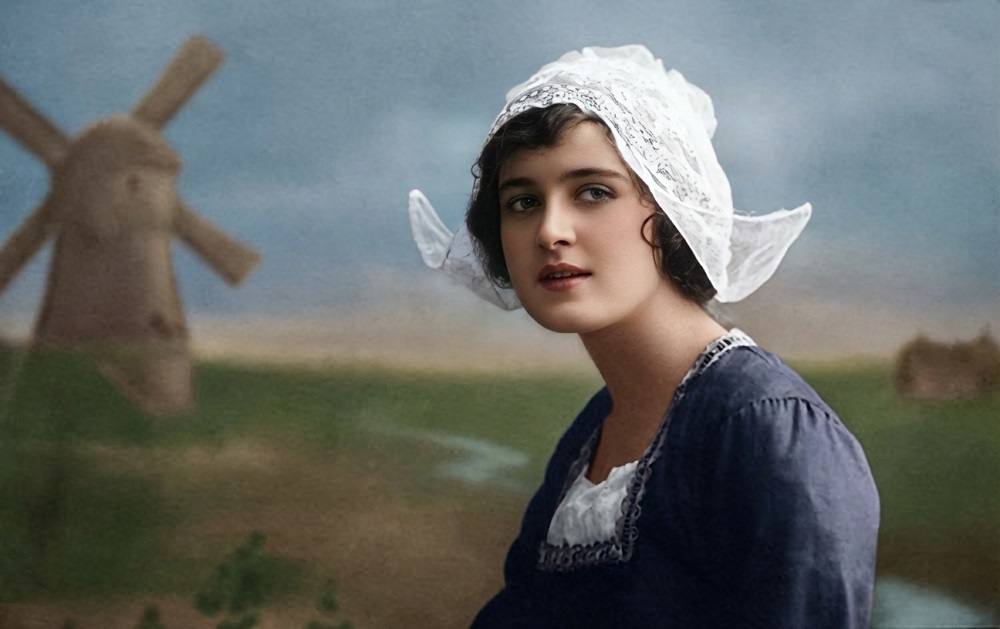
By breaking it down, you guide the AI to refresh the image thoughtfully. The outcome is a revitalized photo that looks newer yet keeps the heartfelt memories intact.
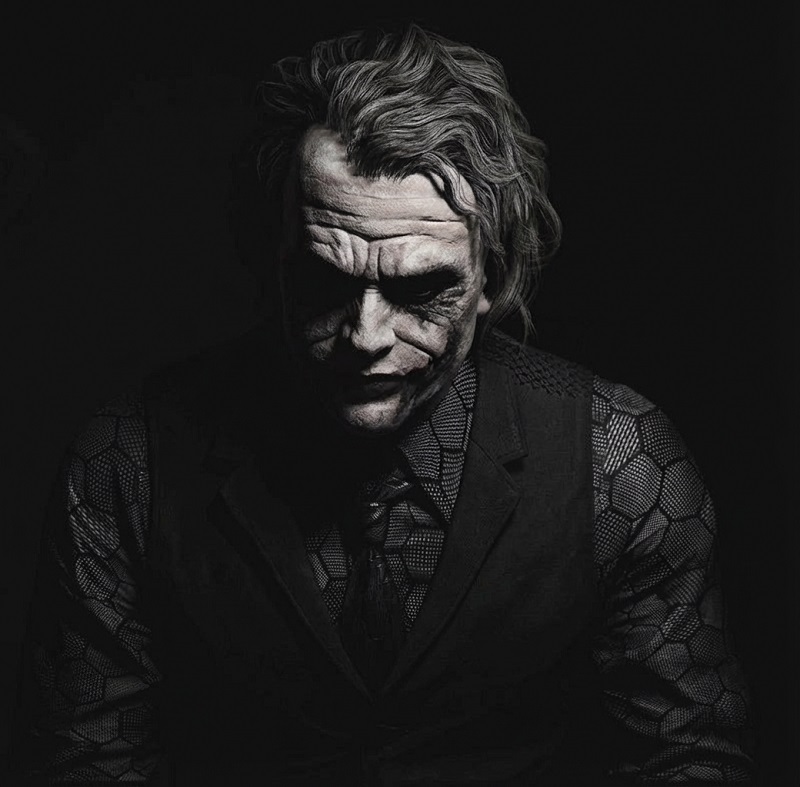
3. Remove Blemishes Without Altering Facial Structure
Spots, scratches, or mold can mar an otherwise perfect shot, but hasty removal often warps proportions or creates inconsistencies in lighting. The secret is targeted, texture-aware editing that maintains the subject’s natural form.
What Not to Do:
Skip: “Remove the pimples/scratches/mold.” This broad stroke could distort the face, making it look unnaturally smooth or asymmetrical.
What to Do Instead:
Instruct:
Use inpainting techniques combined with texture repair to eliminate blemishes. Maintain the original face shape, natural lighting, and shadows. Do not deform the facial features or alter contours.
-

- Before

-

- After

This method seamlessly blends fixes into the image, erasing flaws while honoring the subject’s unique features. Blemishes vanish, but the face’s authentic lines and expressions remain perfectly preserved.
4. Brighten Dark Photos Without Overexposing Colors
Underexposed images can hide beauty in shadows, but a simple “brighten it up” often washes out hues, creating a flat, burned-out effect. Aim for balanced illumination that revives details without sacrificing the photo’s mood.
What Not to Do:
Don’t request: “Make this photo brighter.” This can amplify highlights excessively, leading to color shifts and loss of depth.
What to Do Instead:
Say:
Gently increase exposure and highlights, recover details in shadows, reduce noise, and preserve realistic skin tones. Create a brighter version without changing the overall mood or atmosphere.
-

- Before

-
- After
The result is an image that’s illuminated, clean, and visually appealing—vibrant yet controlled, avoiding any garish overkill.
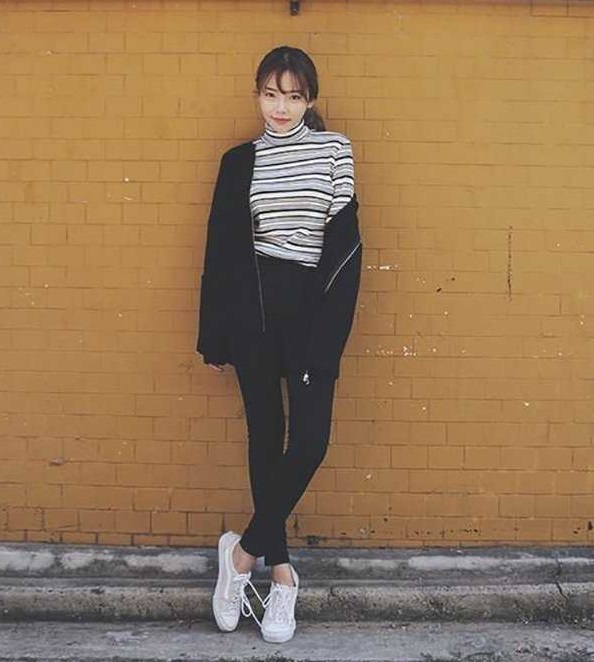
5. Elevate Photos to Studio-Quality Standards
Everyone dreams of pro-level shots, but saying “make it look like it was taken with a fancy camera” rarely delivers. Instead, emulate studio workflows by specifying enhancements that build on the original composition.
What Not to Do:
Avoid: “Make this photo look like it was shot with a high-end camera.” This ambiguity might impose generic filters that clash with the source material.
What to Do Instead:
Detail:
Recreate the photo in a studio style: enhance overall sharpness, clean up the background, adjust skin tones for natural warmth, and boost micro-contrast for depth. Preserve the original expression and lighting. Provide a step-by-step explanation of each edit.
-

- Before
-
- After
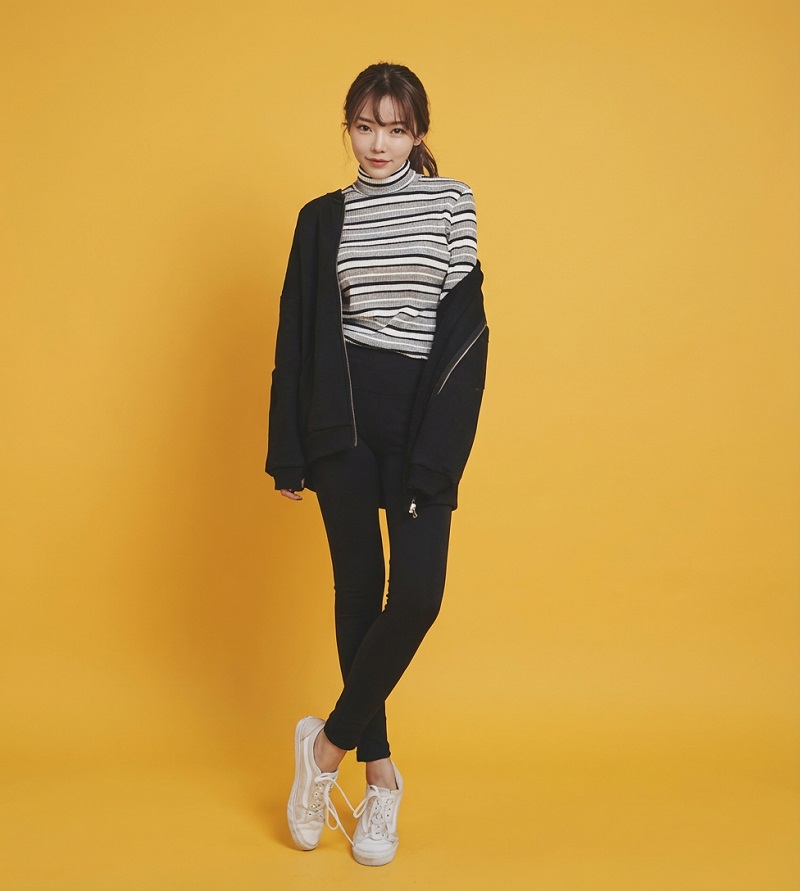
This prompt not only transforms the image but also builds trust by requesting transparency. You’ll get a polished, professional upgrade that feels like a natural evolution of the original—expressive and elegantly refined.
Why These Prompts Matter: Unlocking AI’s True Potential
Effective prompting is about collaboration between you and the AI: you’re the director, providing the vision, while the tool executes with precision. By avoiding vagueness and emphasizing natural preservation, you’ll consistently achieve edits that enhance rather than overhaul. Experiment with these templates in your favorite AI image editor, and watch ordinary photos become extraordinary keepsakes. Remember, the best results come from specificity—your details dictate the difference between good and gallery-worthy.
 Facebook
 LinkedIn
 X
X
 Reddit